
Comparison
Compare SD-WAN by Sector
Meraki delivers SD-WAN, integrated security, licensed software, management and orchestration tools. Cisco supports a broad global customer base, with approximately 46,000 SD-WAN enterprise clients across diverse sizes and industries. In the coming 18 months, Cisco plans to focus on enhancing their security dashboard by integrating third-party Security Service Edge (SSE) for dual-vendor SASE support. Meraki is often used with the retail and healthcare sectors where their CCTV and strong WiFi capability are recognised enablers to their specific needs.
The goal of our test was to understand the setup of Meraki SD-WAN and SASE Security solutions using our demo portal. The test focused on several key features:
I started with the Meraki dashboard in order to create the initial network setup by naming the network - for example "Netify - Wireless" - and selecting the network type from a range of options such as Wireless (MR series) and Security appliance (MX series). In use cases where there are numerous devices are connected, the 'Combined hardware' option can be selected. Adding devices to the network required entering order numbers or serial numbers and then selecting 'Claim' to include the desired devices.
I created a new network, customising the network name (SSID) and setting up security with WPA2 encryption. Careful attention was given to the access control settings to establish connection policies and authentication methods. In addition, I configured firewall rules and traffic shaping policies to manage network usage. A guest SSID was already set up for visitors to ensure they had internet access while maintaining network security.
Below: Meraki is capable of easily viewing network-wide stats by applications.
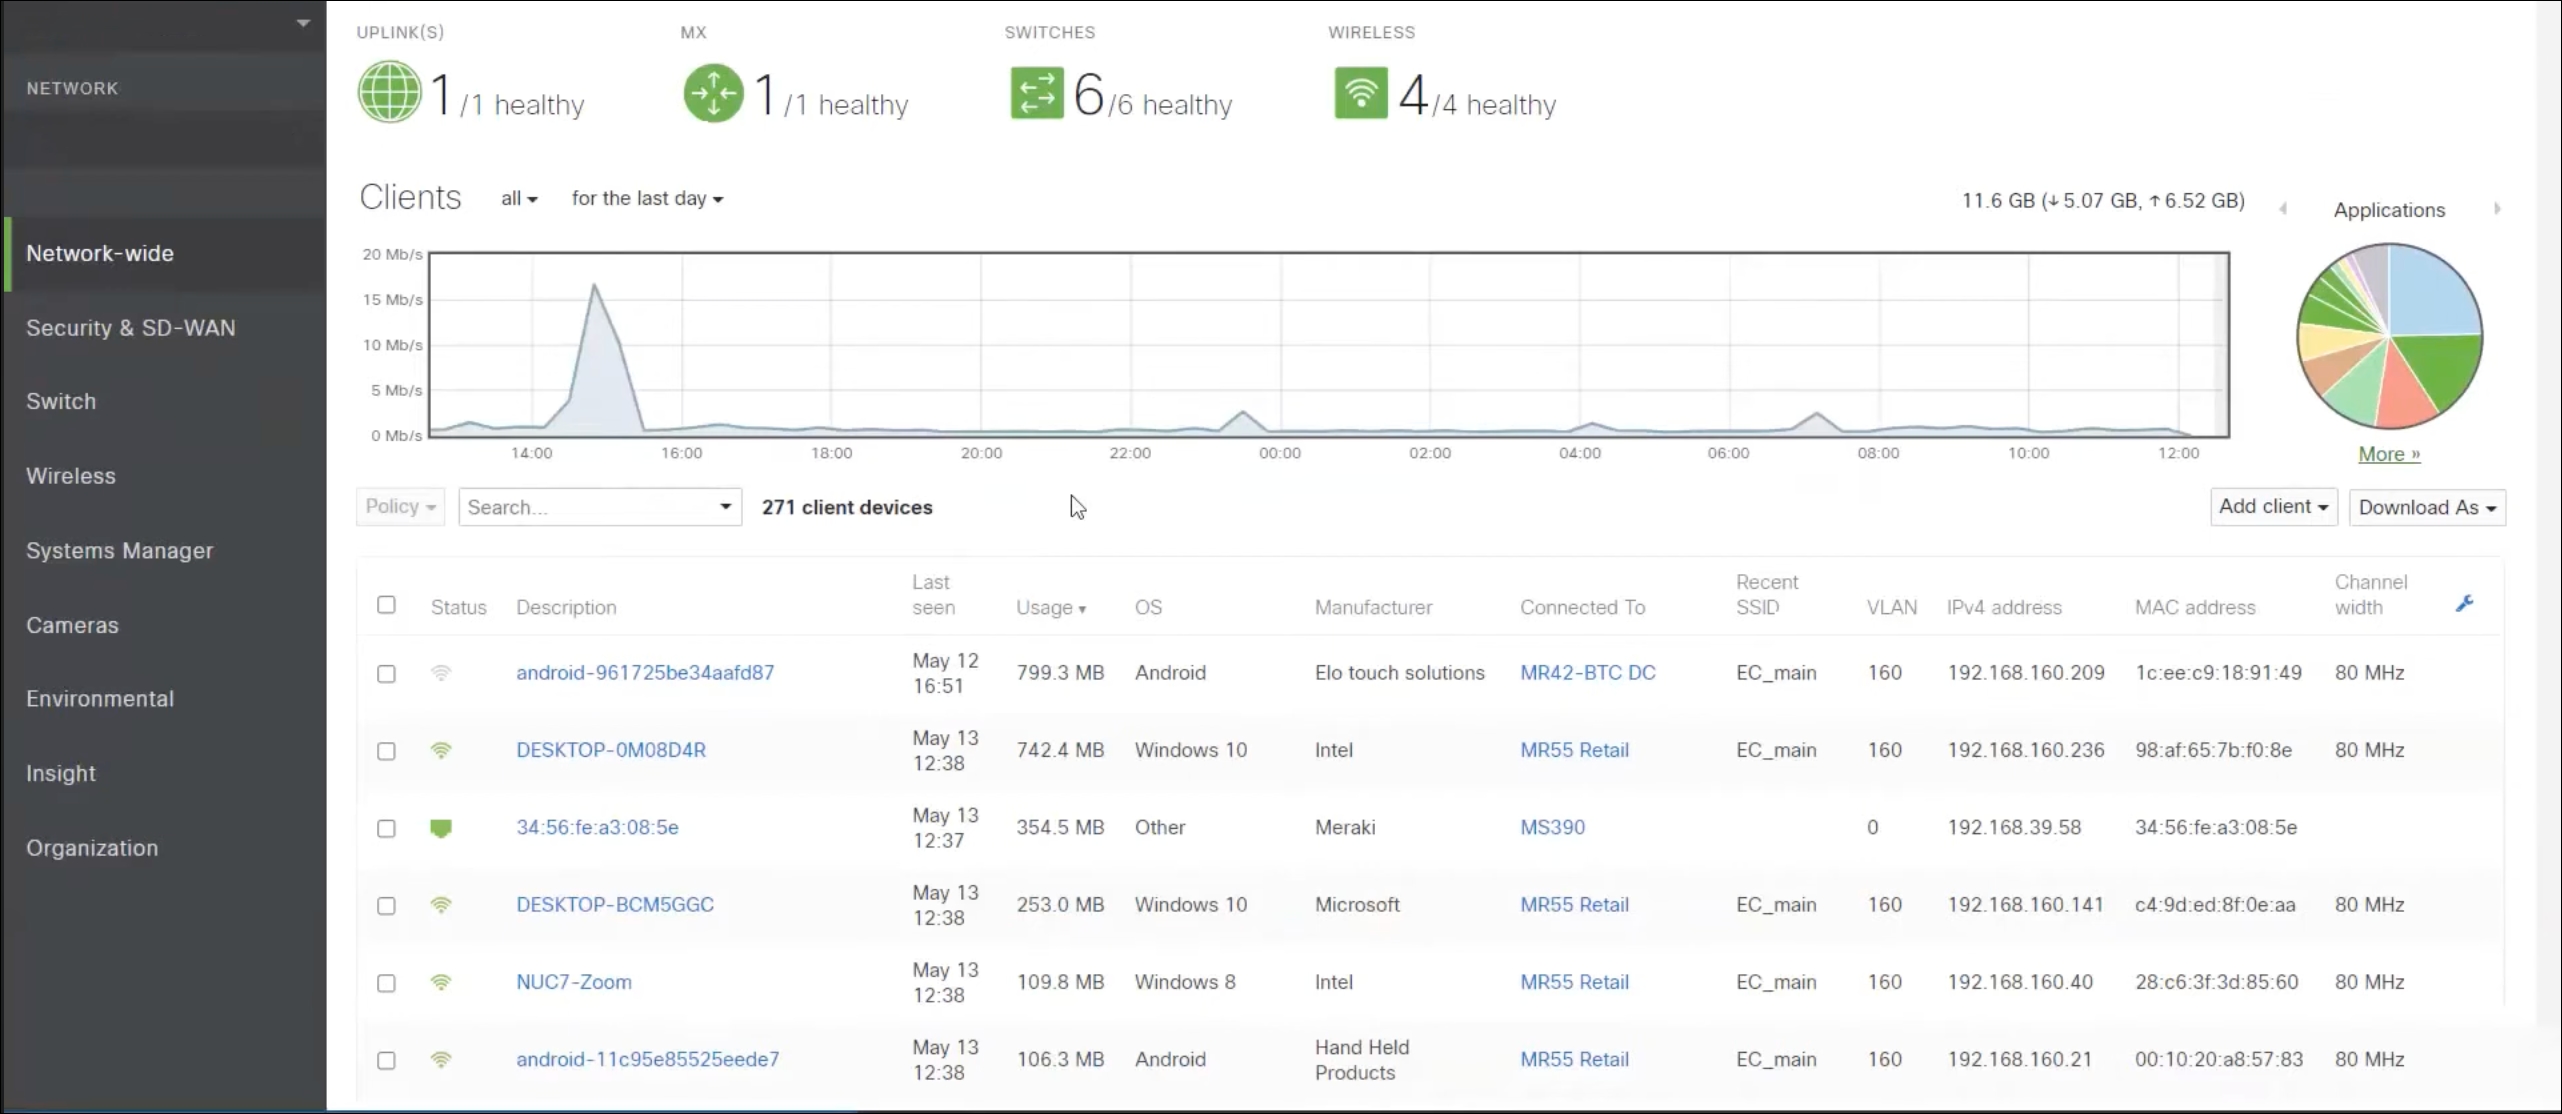
After setting up our Meraki WiFi device and conducting a connection test, I found that the Meraki Dashboard test showed the expected speed of 200Mbps for wired clients. Regularly monitoring network performance using the Meraki Dashboard helped to identify and address areas with high utilisation, latency, or packet loss.
Setup of Cisco Umbrella required me to generate an Umbrella API Key and secret, and then inputting these credentials in the Meraki dashboard under the Cisco Umbrella account section. This step was required before setting up DNS traffic through Cisco's Umbrella DNS service to create an additional layer of security.
The final phase required deploying the Meraki Umbrella SD-WAN Connector via the Cloud On-Ramp in the Meraki dashboard and adding the API keys from the Umbrella dashboard. The deployment process was initiated by selecting 'Connect to Cisco Umbrella', entering the management API key and secret, and then choosing 'Deploy'. The selection of the Data Center location pair for the Connectors was the last step.
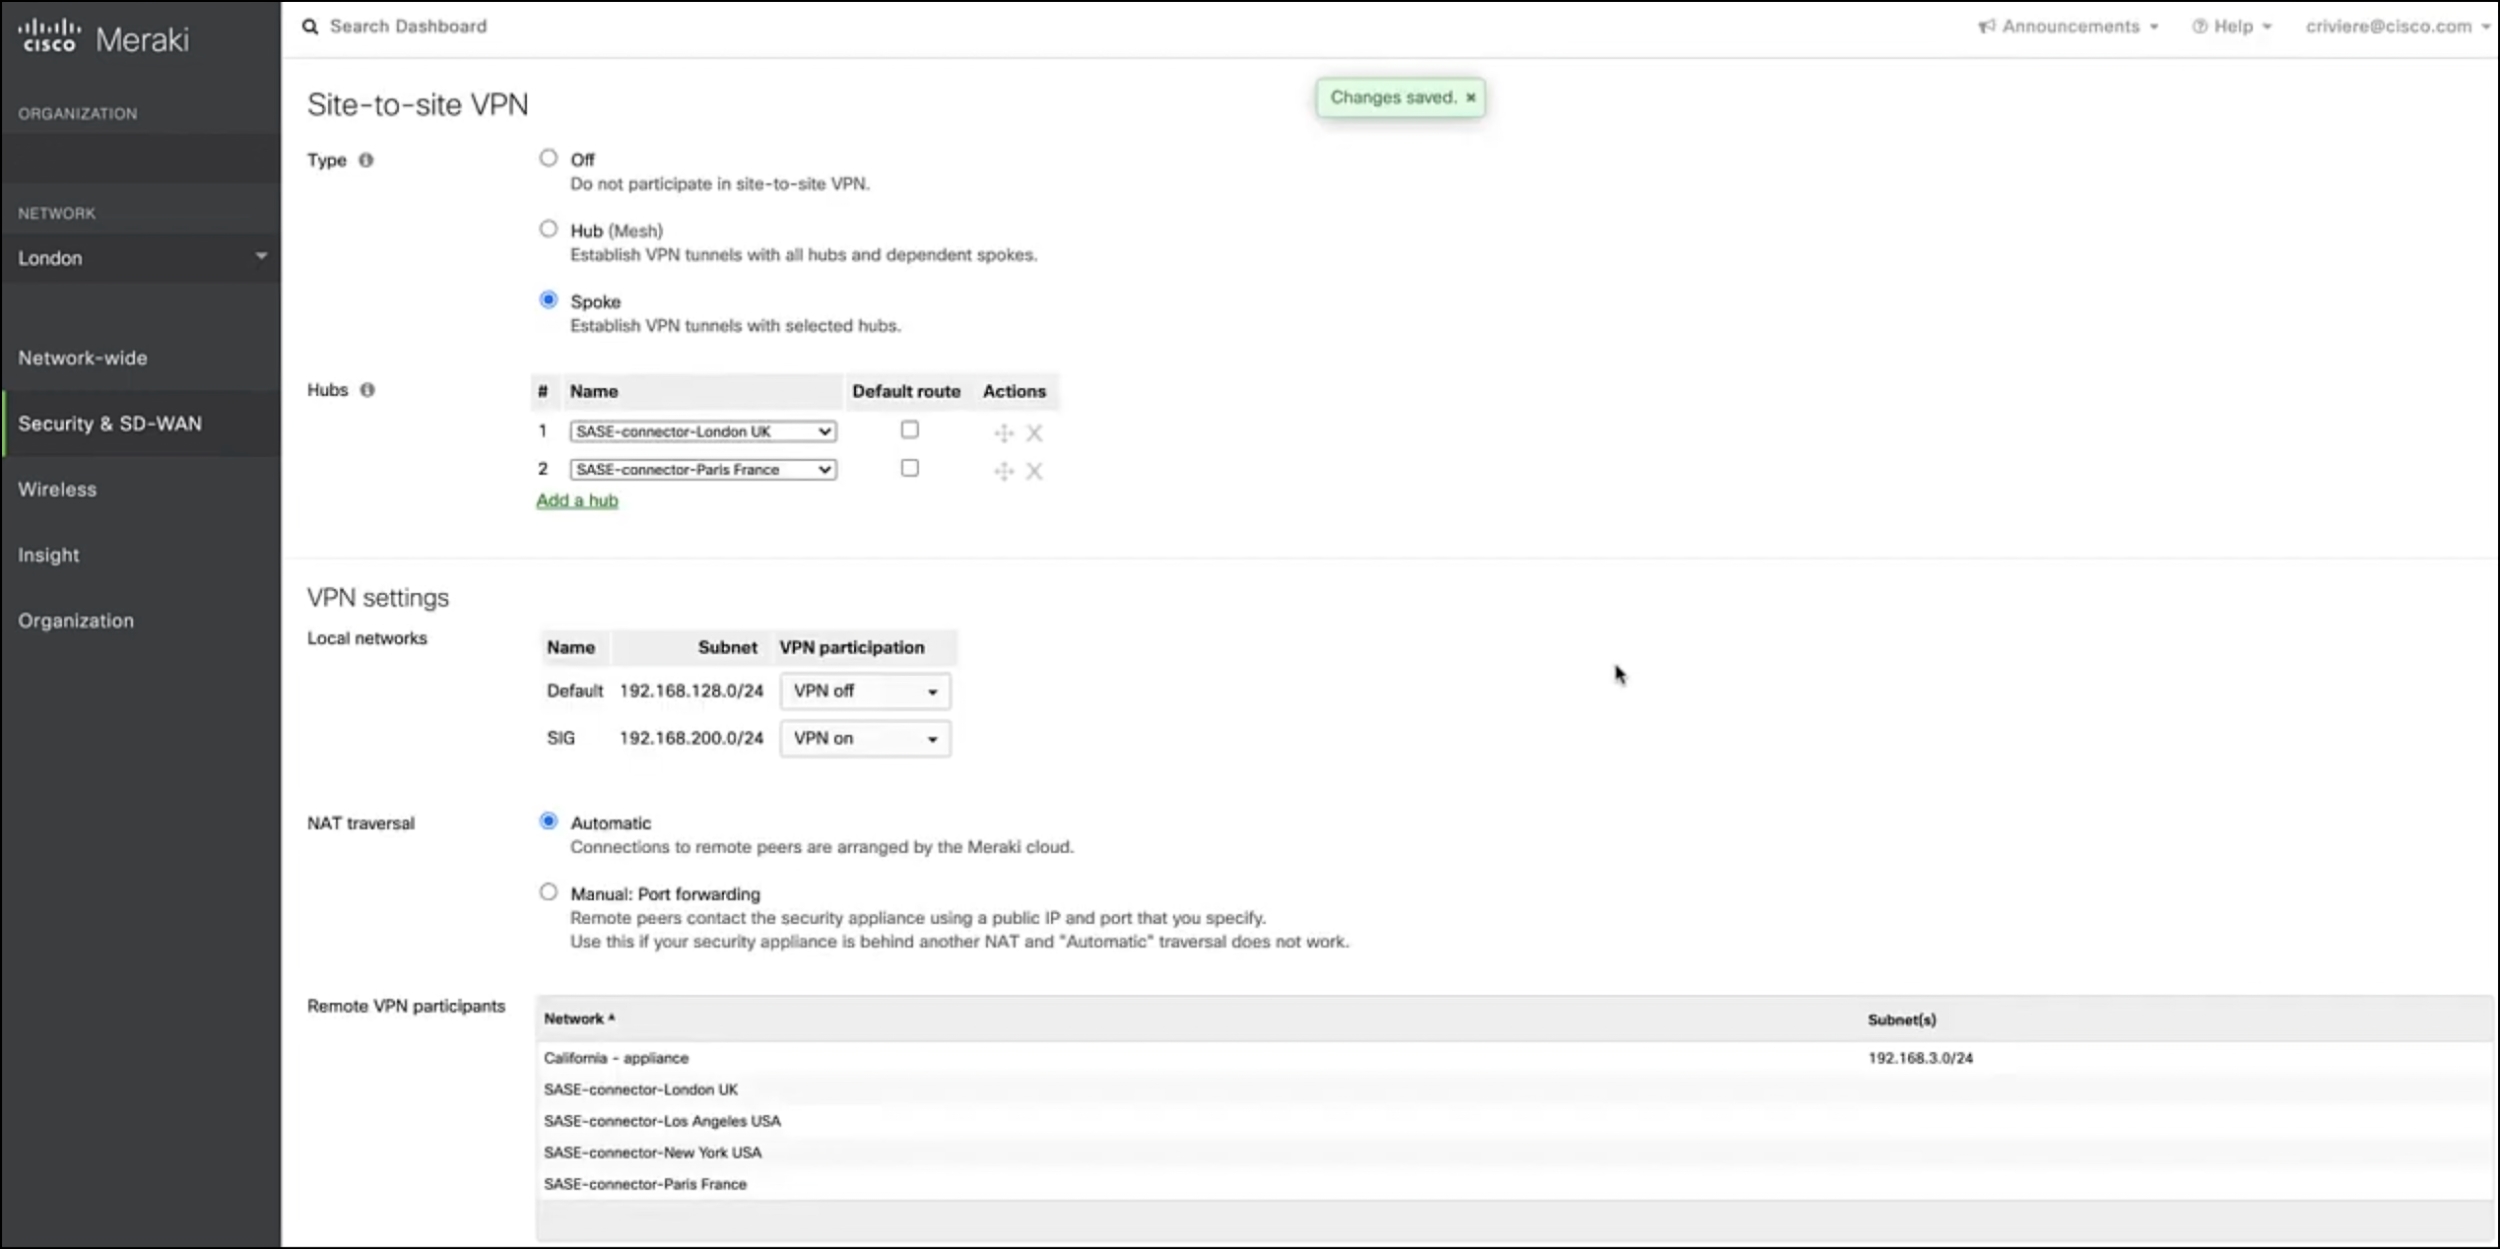
Below: Creating a site-to-site VPN is fairly simple with Meraki.
We also wanted to take the opportunity to configure Meraki CCTV cameras. We completed an initial camera setup by accessing the Meraki dashboard. The steps we followed enabled fast setup of cameras, they included selecting 'Network-Wide' > 'Devices' to find the camera. Then we clicked on the camera for settings, set the camera name and adjusted resolution and frame rate video settings. Under 'Analytics', we enabled motion alerts and define zones for activity detection.
Meraki's SD-WAN has seen significant evolution over the years. Around 2018, some users felt that Meraki's SD-WAN was essentially a cloud-managed version of dual-homed routers with auto failover. Over time, Meraki's SD-WAN has matured and expanded its capabilities. Users have reported positive experiences with the ease of deployment, uptime, and hardware reliability.
Please complete the form to ask a question or send a message directly to Cisco Meraki. Netify have carefully curated global sales contacts based on your IP location. If you do not receive contact, please check your junk folder.
Book a demo of the Cisco Meraki SD WAN and SASE security capability over Zoom or Teams. Learn about their management portal, deployment, SLA and support. You will receive an email asking for times/dates, please check your junk folder if not received.
A Netify Vendor Briefing is a 30 minute Zoom research session for IT decision makers, and an opportunity to learn about the vendors products, services and business strategies specifically or a related technology or market. We'll also discuss their competitors and which other solutions your business should consider. If you do not receive contact, please check your junk folder.